How to access the Windows Recovery Environment
The Windows Recovery Environment is a very useful tool for any IT technician or end user that would like to resolve issues when accessing Windows normally is no longer working. Any time Windows refuses to boot properly, the Windows Recovery Environment is the first stop in trying to resolve these issues. Where we can hopefully get Windows back up and running again using the various tools that are available within this environment. Be aware that you'll also need to know the password for a local administrator account that already exists on the computer in order to access most of these utilities.
- Startup Repair allows Windows the option to automatically identify and repair trouble with system files that may be preventing it from booting.
- Startup Settings will allow us access to a familiar menu where one can boot into Safe Mode or enable debugging or logging.
- The Command Prompt will allow us the option to submit commands that would potentially resolve issues with Windows not booting. Such as rebuilding the boot configuration data or running a chkdsk repair.
- An option to Uninstall Updates is available if it's suspected that a recent update or feature pack has caused Windows to not boot.
- UEFI Firmware Settings will allow access to the UEFI firmware or system BIOS.
- System Restore will allow one the option to restore their computer back to a time when it was working properly.
This guide will go over the various options on how to access the Windows Recovery Environment. How to access the Windows Recovery Environment while Windows is still able to boot will be briefly discussed. While the various other methods involving booting to the Windows Recovery Environment will be outlined in more detail. This is due to when someone has the need to access the Windows Recovery Environment, it's normally due to the fact that they can no longer boot to Windows normally.
Option 1: Holding Shift or restarting from Windows Recovery
These two methods of rebooting into the Windows Recovery Environment will only be available if you're still able to access Windows normally. It's felt that these methods will be rarely used in cases where Windows needs an extensive repair. You'll likely only be accessing the Windows Recovery Environment via one of these methods if you'd like to boot into Safe Mode or perhaps run a System Restore without any third party services or applications running the background.
The first method is to hold down the Shift key on your keyboard when restarting Windows. This will be the quickest and easiest method of accessing the Windows Recovery Environment. Please follow the steps below:
- Right click the Windows start button that's normally located at the bottom left of the screen.
- Hover over the option, "Shut down or sign out" and then move over to the Restart option in the sub menu that appears. Do NOT click on restart at this time.
- Hold down of the Shift key on your keyboard and then click the Restart option from the menu while still holding down the Shift key.
- Once the computer begins to restart, you can release the Shift key and Windows should then boot to the Windows Recovery Environment when it restarts.
The other method of accessing the Windows Recovery Environment while Windows is still able to boot is by going into Recovery from the Windows Settings. This is a slightly longer method than the steps above, but will still get you into the same Windows Recovery Environment if Windows hasn't responded to the Shift key for whatever reason. Follow the steps below to reboot into the Windows Recovery Environment from the Windows Settings menu.
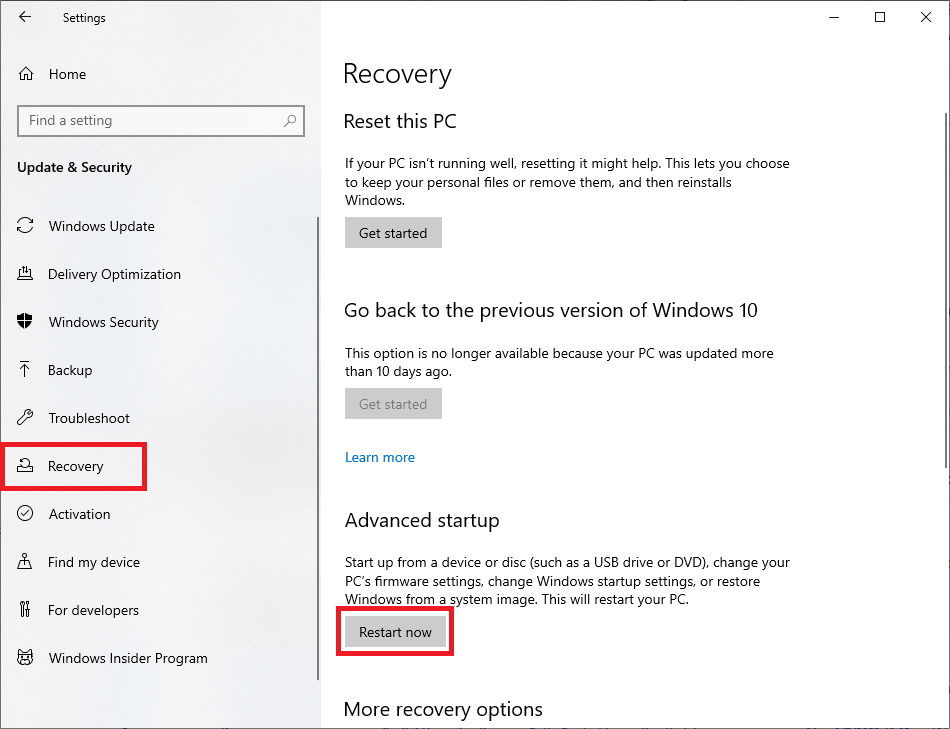
- Press the Windows logo key and the letter I on your keyboard simultaneously. This will open the Windows Settings.
- Select the option for, "Update & Security" and then select "Recovery" in the menu that follows.
- Under the "Advanced startup" headline, click the button that says "Restart now." Windows should then boot into the Windows Recovery Environment when it restarts.
Option 2: Press F8 during startup
A lot of people will find that this method doesn't work for them, but some are still able to access the startup options using the classic means of repeatedly tapping on the F8 key while their computer is starting up. Starting with Windows 8, accessing the startup options via this technique has become less successful with the changes in how Windows boots. Recently I was able to access the Windows Recovery Environment on a Windows 2012 R2 Server through these means. You may perform the following steps below to access the Windows Recovery Environment via this method.
- Make sure your computer is turned off completely.
- Press and release the power button to start the computer and immediately and repeatedly start pressing on the F8 key on your keyboard. You'll want to tap it at a pace of 2-3 times per second. Do not hold the key down.
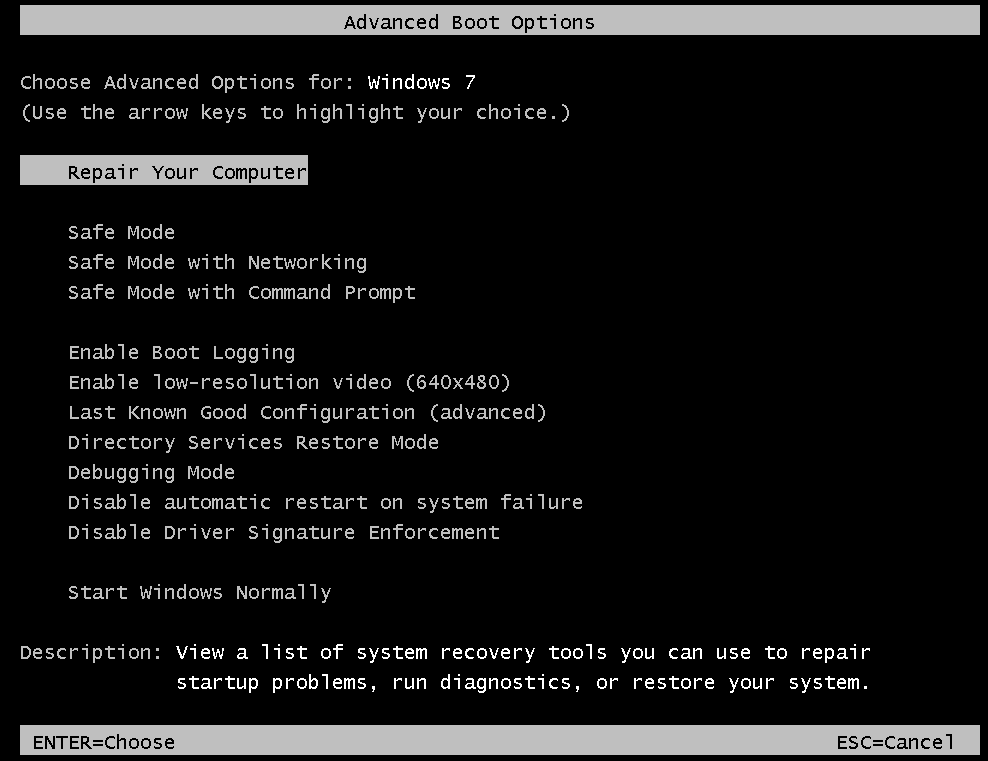
- Keep an eye on the screen for a menu to appear that looks similar to the one shown in figure 2 below. If you see the Windows or PC Manufacturer logo with the spinning dots underneath, then you didn't press F8 fast enough or this option isn't going to work for your system and you'll need to try another method.
- Select the option to "Repair Your Computer" from the menu that appears to access the Windows Recovery Environment.
Option 3: Simulate a boot failure by powering off the computer
Modern versions of Windows are programmed to automatically perform a startup repair with an option to then enter the Windows Recovery Environment after a number of consecutive boot failures. We can simulate these failures by powering off the computer at the right moment to trigger these events. This will likely be the easiest and most reliable method of accessing the Windows Recovery Environment on a computer that will no longer boot to Windows normally. You may perform the following steps to enter the Windows Recovery Environment via this method.
- Start with your computer completely powered off.
- Press and release the power button to startup the computer and pay close attention to the display.
- Once you see the Windows or PC manufacturer logo and the spinning dot animation, quickly press and hold the power button on the computer until the PC turns off. This should take about 5 seconds.
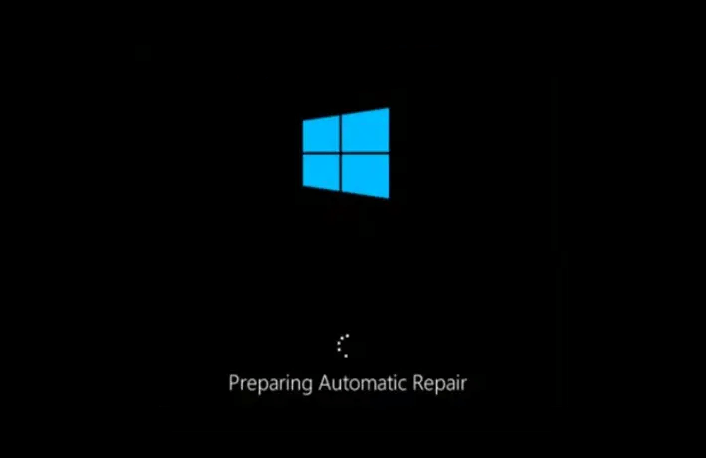
- Repeat the two steps above for a second and, if necessary, a third time. You should eventually see that Windows will begin to run an automatic repair procedure during one of the times it's restarted.
- Allow it to complete the automatic repair procedure and then select the "Advanced Options" button that's displayed on the following screen to enter the Windows Recovery Environment.
Option 4: Use a Windows installation USB drive
This option will require that you create or already have access to a USB drive that contains the Windows installation media. In addition to installing Windows, this media also allows the option to enter the Windows Recovery Environment directly for the USB drive. Which can be useful if you're not able to access the Windows Recovery Environment that's available on the local disk. If you don't have a Windows installation USB drive, you can create one using any 16GB or larger capacity drive for either Windows 10 or Windows 11 depending on which OS you're using.
The steps required to boot to a USB drive will also be different depending on your computer's model, manufacturer, and age. The easiest method is to access the one time boot menu and then selecting the USB drive to boot from, but you may have to adjust the boot order and set the USB drive as the first option within the system BIOS instead. Below is a list of common PC manufacturers with their BIOS and boot menu keys.
- Acer: Del, F2.
- Asus: F2, F9, Del.
- Dell: F2, F12.
- HP: F1, F10, Esc.
- Lenovo: F1, F2.
- MSI/Gigabyte: Del.
- Toshiba: F1, F12, Esc.
If your computer manufacturer isn't in the above list or if the specified keys are not successful in accessing the BIOS and boot menus, pay close attention to the outskirts of the display as the computer boots. This is where it'll normally show what key you'll need to press to access these menus. You'll also need to press this key quickly. So once the correct key is determined, you may need to reboot the computer and start tapping on the corresponding key repeatedly until the applicable menu appears.
Once you've successfully accessed either the boot menu or have adjusted the boot order in the BIOS to have the computer boot to a USB drive first, you're then ready to access the Windows Recovery Environment from the USB drive via the following steps.
- Turn off your computer and insert the Windows installation USB drive. This is the USB drive that has already been prepped with the Windows installation media.
- Startup the computer and either press the corresponding key to access the boot menu or allow it to boot to the USB drive if you've adjusted the BIOS boot order accordingly.
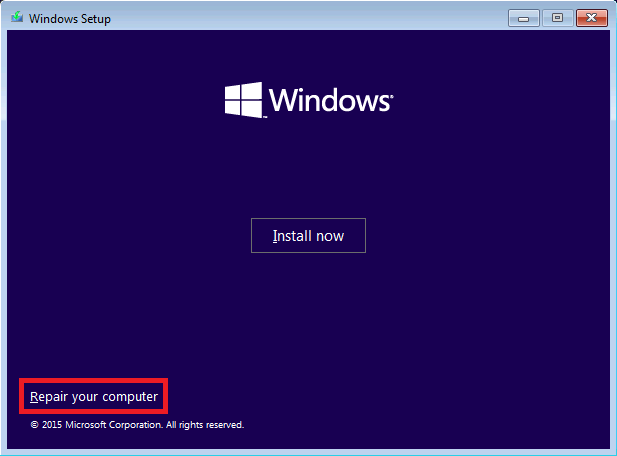
- Once the Windows installation media has successfully loaded, select the appropriate language and then select the option to "Repair Your Computer" that'll appear at the bottom left corner of the installation screen. This will bring you to the Windows Recovery Environment.