Attaching virtual switch to LBFO team is deprecated
Those familiar with applying a virtual switch interface to an LBFO NIC team in Hyper-V on earlier versions Windows Server will run into an error when performing this process on Windows Server 2022. The error that's received will state the following information:
Error applying Virtual Switch Properties changes
Failed while adding virtual Ethernet switch connections.
Attaching a virtual switch to an LBFO team is deprecated. Switch Embedded Teaming (SET) is an inbox replacement for this functionality. For more information on LBFO deprecation please see https://aka.ms/LBFODeprecation. To override this block, use the AllowNetLbfoTeams option in New-Switch.
This error suggests the use of Switch Embedded Teaming or SET. This is the successor to LBFO NIC teaming that was introduced in Windows Server 2016. SET offers benefits over the use of LBFO, but most of these improvements are for network connections that exceed 10Gbps. SET also doesn't support static teaming or LACP. So if your network is configured to use either of these protocol or if you wish to make use of them, it'll be best to stick with LBFO teaming.
This guide will show you the options available to solve this error by either creating a NIC team via SET or enabling support for and using a legacy LBFO team.
Option 1: Use Load Balancing/Failover (LBFO)
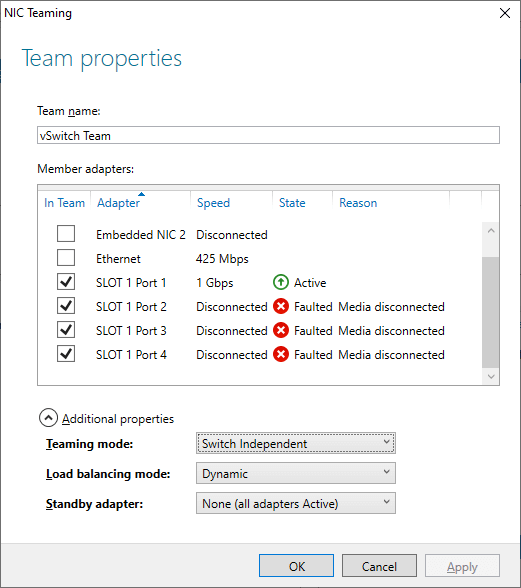
Making use of LBFO is a two step process that first involves creating the NIC team within Server Manager. Then attaching the virtual switch to this interface. Create the NIC team in Server Manager and select the network interfaces that you'd like to use in your virtual switch interface. You may adjust the options in the additional properties to your desired configuration. If you're unsure of what options to select here, you can leave them at their default values. Switch Independent and Dynamic for Teaming Mode and Load Balancing Mode respectively. You may also want to consider going with option 2 discussed later in this guide. The LBFO configuration should be used in cases where your network is already setup to use LACP or static teaming.

Once the NIC team has been successfully configured, you'll then need to issue the following Powershell command to create the Hyper-V virtual switch using the legacy LBFO option. Replacing [VSWITCH NAME] and [TEAM NAME] with the name you'd like to assign to the virtual switch and the team name of the NIC team that you've created in the previous steps respectively.
New-VMSwitch -Name "[VSWITCH NAME]" -NetAdapterName "[TEAM NAME]" -AllowNetLbfoTeams $true -AllowManagementOS $false
The above command makes use of two properties. The first is required and allows the use of LBFO teams in the virtual switch. The second is optional and will disallow the management operating system from sharing the virtual switch interface. If this isn't desired, you may change the value appended to -AllowManagementOS from $false to $true.
Option 2: Use Switch Embedded Teaming (SET)
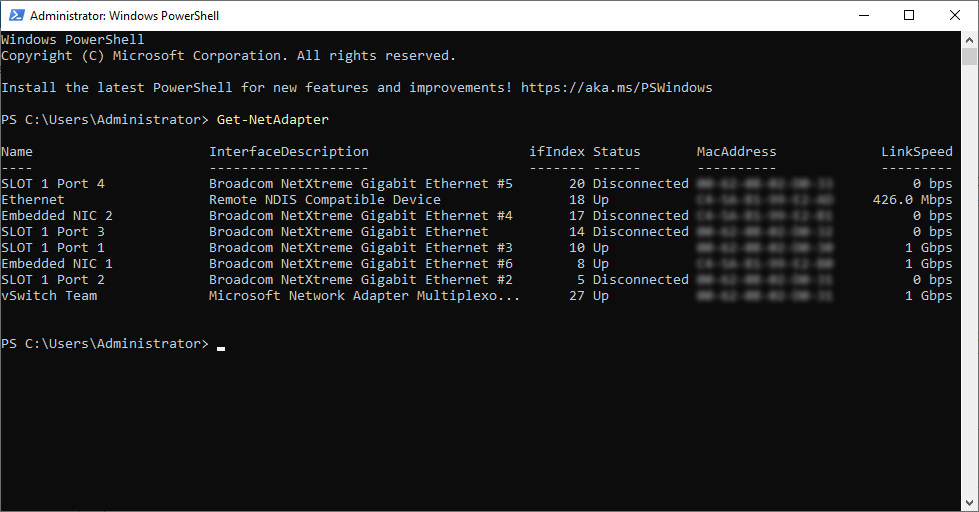
Switch Embedded Teaming creates the NIC team and assigns it to the switch in a single command. Before the virtual switch can be created, the network interfaces that'll be part of the NIC team will first need to be identified. This is done using the following Powershell command to list the network interfaces.
Get-NetAdapter
This command will generate a table of information with one of the columns labeled "Name." Take note of the interface names that are associated to those that you'd like to assign as members of the SET team.

Once this information has been gathered, the command to create the SET team and virtual switch can be issued. The command below assumes that there are three interfaces that'll be part of this SET team with a name of Ethernet2, Ethernet3, and Ethernet4. You'll replace these names with the names that you've gathered in the previous steps. Appending any additional interfaces that you'd like to use if necessary. Replace [VSWITCH NAME] in the command below with the name that you'd like to assign to the virtual switch.
New-VMSwitch -Name "[VSWITCH NAME]" -NetAdapterName "Ethernet2", "Ethernet3", "Ethernet4" -AllowManagementOS $false
As with the LBFO configuration in option 1, if you'd like for the management OS to be able to share the interface with the virtual switch, you may change the value appended to -AllowManagementOS from $false to $true. The virtual switch should now be created and is available for use on the virtual machines that are configured in Hyper-V.
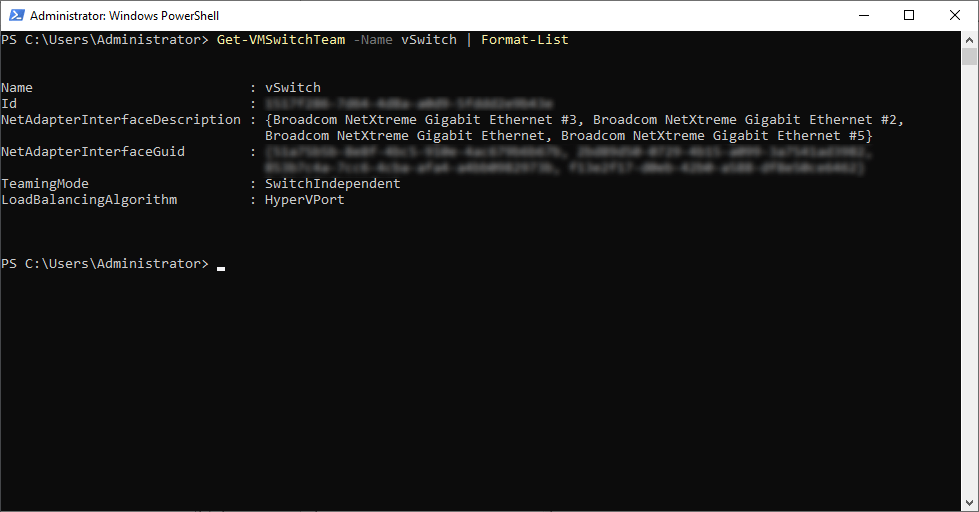
The following command can be used to view the current properties that are assigned to the SET team. It can be useful to know what the current teaming mode and load balancing algorithms that are currently assigned to the virtual switch. So that they can be changed if necessary. Replace [VSWITCH NAME] in the following command with the name you assigned to the virtual switch in the steps prior.
Get-VMSwitchTeam -Name "[VSWITCH NAME]" | Format-List

If you'd like to change the settings for either the teaming mode or the load balancing algorithm, you may use the following command format. The command below will set the load balancing algorithm of the virtual switch to Dynamic. Replace [VSWITCH NAME] with the name that you've assigned to the virtual switch.
Set-VMSwitchTeam -Name "[VSWITCH NAME]" -LoadBalancingAlgorithm Dynamic