Microsoft 365 Exchange Automated Message Trace
Any time an admin finds themselves performing repetitive tasks, it's always best to consider the option of automation. In this scenario, an admin would be completing daily or weekly message traces using Exchange Online from within the Microsoft 365 Admin portal. There's a number of concerns beyond that of the task being just an inconvenience to the administrator. Completing tasks manually has the potential risk of human error. Certain parameters could be configured incorrectly or the administrator may not be available to complete the task manually during each time that it's needed.
The steps in this article will outline how a Microsoft 365 administrator can automate these message trace tasks using PowerShell and app registrations within Microsoft Entra. This PowerShell script can then be scheduled to run via Windows Task Scheduler from a computer to save the results to an exported CSV file. As an added bonus, we'll also design this script to perform maintenance on this directory to automatically purge CSV files that are older than 180 days. This will prevent the directory where these CSV files are stored from continuously increasing in size and requiring manual cleanup procedures to prevent an excessive use of storage space.
Step 1: Creating the App Registration in Microsoft Entra
The first step in this process is to create the App Registration within Microsoft Entra. An App Registration is recommended as a more secure method over the alternative of storing login credentials for a service account within the PowerShell script itself.
- Log into Microsoft Entra as an administrator for the tenant you'll be working with.
- In the left hand column, select Applications and then App registrations.
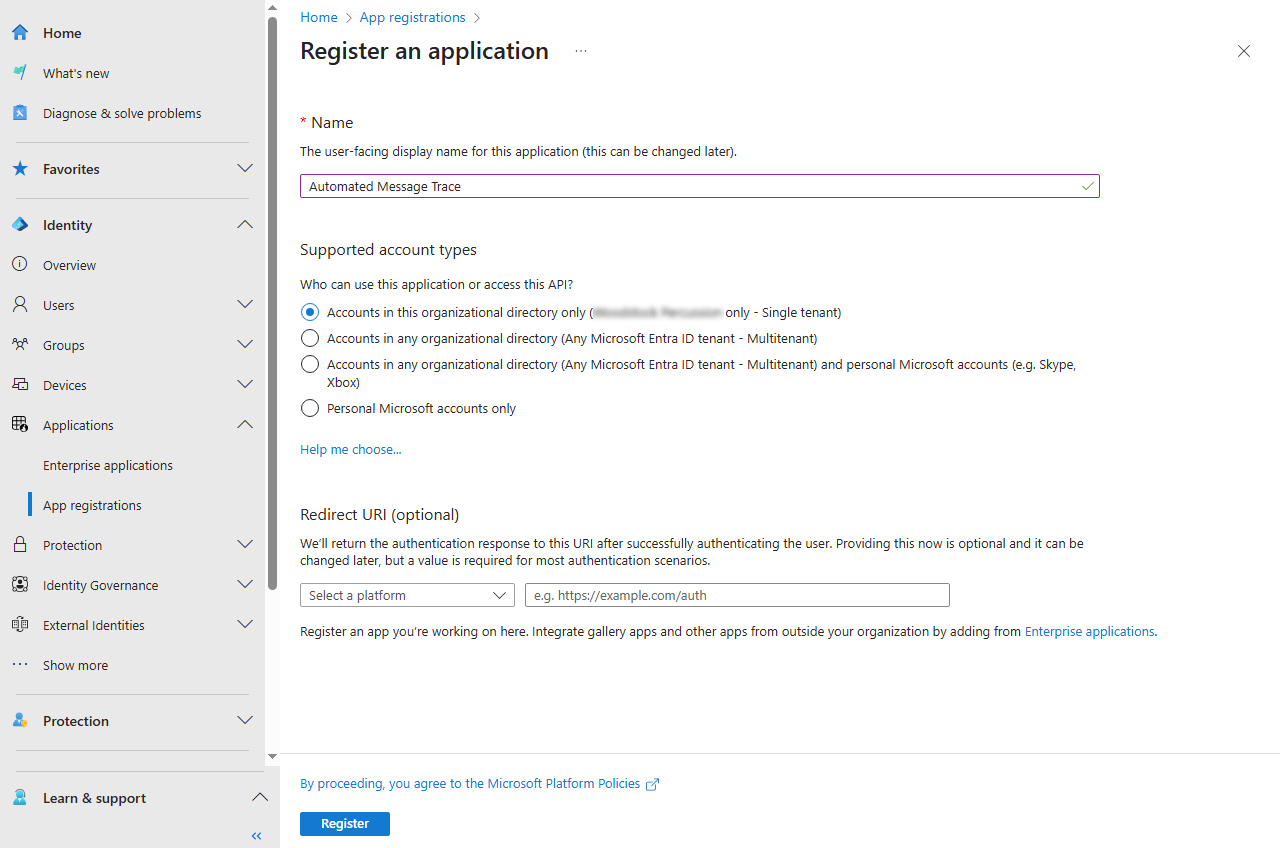
- Select New registration in the menu towards the top.
- Add a unique name for your application. This can simply be, "Automated Message Trace."
- Leave the default option for the supported account type. This will be most secure.
- Click the Register button to register the application.
Depending on your needs, you may want to create separate App Registrations for each message trace script you'll be creating. This is not required, but is helpful when it comes to auditing. What isn't recommended is to utilize a single App Registration for an abundance of different tasks. In this example, we'll be using this registration to run a message trace only. Therefore, it'll only have permissions (which will be assigned later) to complete this specific task.
Step 2: Assign the permissions to the App Registration
There are two different types of permission assignments that'll be necessary for the message trace tasks to complete successfully via the PowerShell script. This is the role based permission of Global Reader and the API permissions to allow the script to log into Microsoft 365 Exchange Online via an app and grant it access to read all service usage reports within Microsoft 365. These permission assignments grant the application only what's necessary to perform the operations that it's intended for.
The steps below will outline how to assign these two types of permissions to the application.
Assign the Role permissions:
- From within Microsoft Entra, select Roles & admins from the Roles & admins blade in the left navigation.
- Select the Global Reader role from the list of roles.
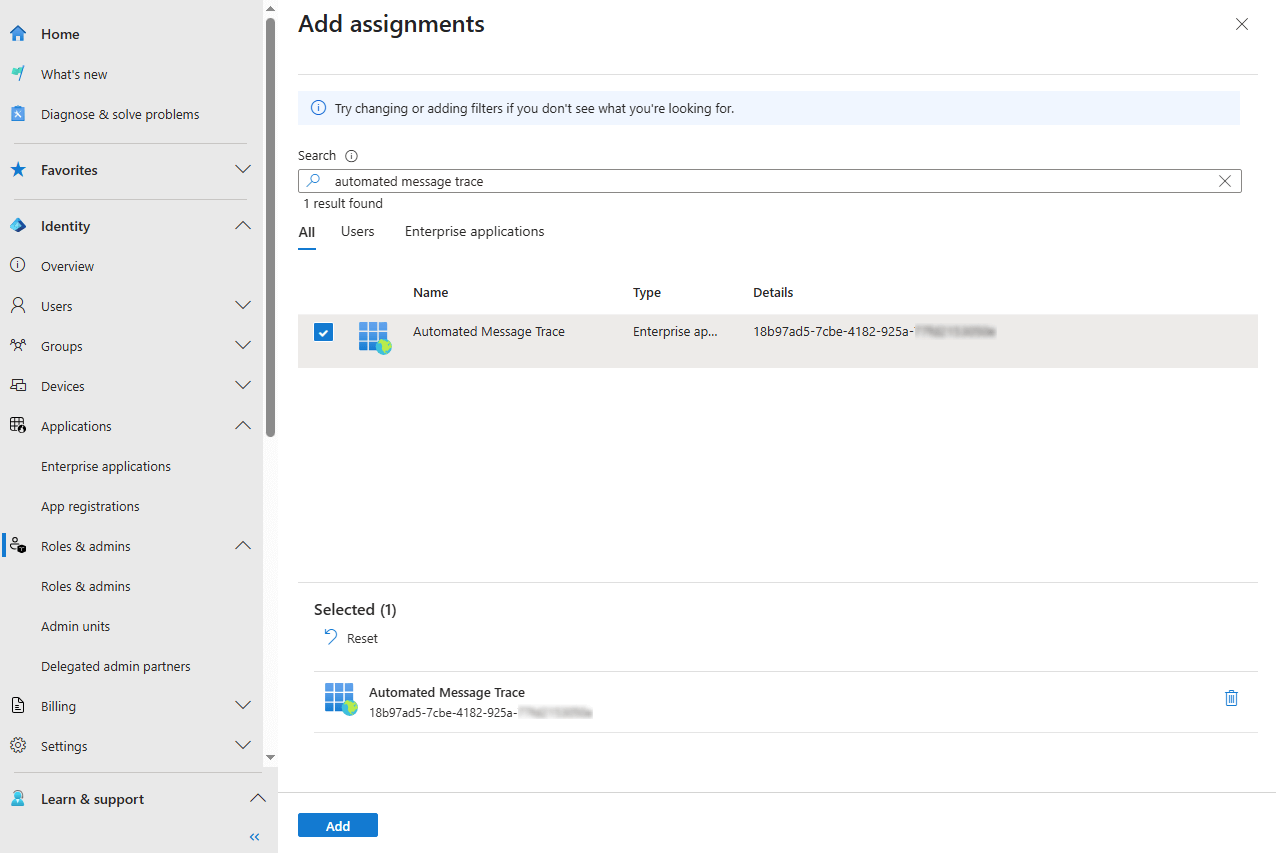
- Click the Add assignment option that's located towards the top.
- Search for and select the App Registration by the name you've assigned it in step 1.
Assign the API permissions:
- Return to the App registrations section within Microsoft Entra.
- Find and select the App Registration that was created in step 1.
- Click API permissions in the settings for the App Registration.
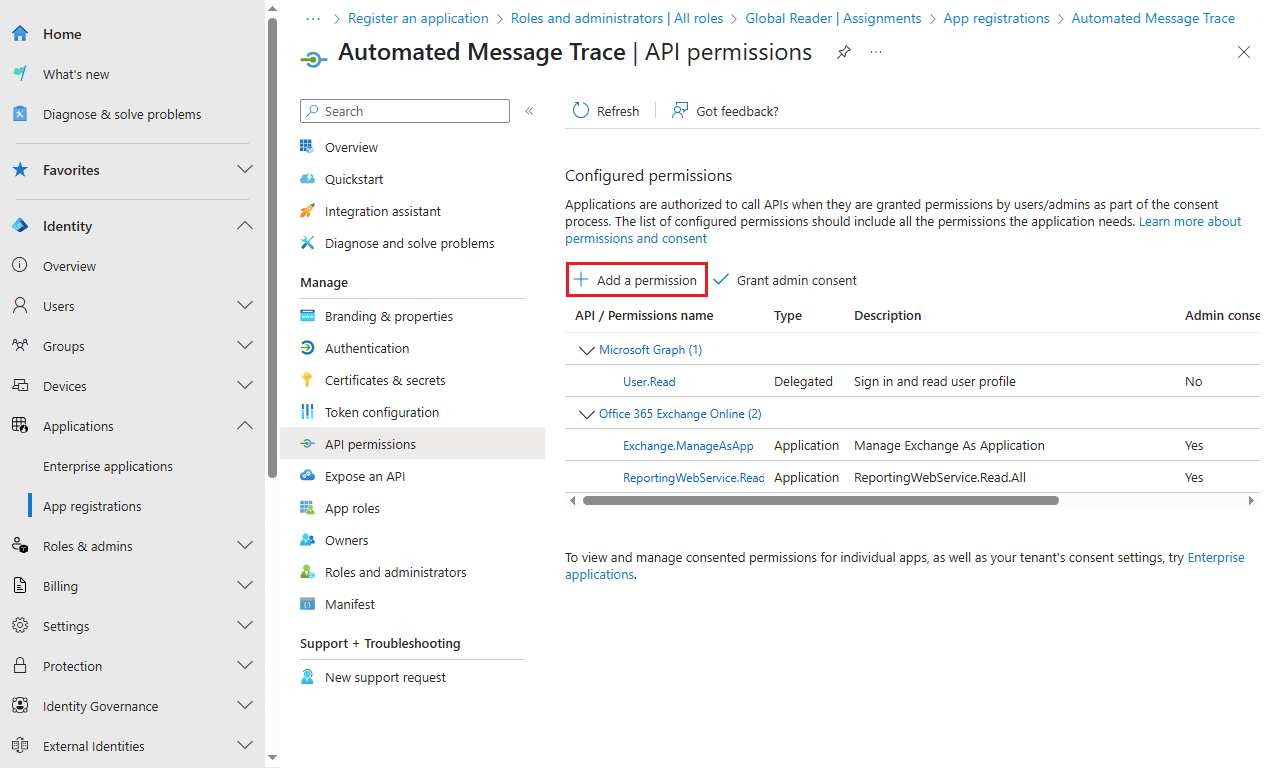
- Click the Add a permission option towards the top.
- Click the APIs my organization uses heading.
- Search for and select "Office 365 Exchange Online" from the list.
- Select the two permissions Exchange.ManageAsApp and ReportingWebService.Read.All from the list of permissions.
- Click the Add permissions to assign these permissions to the application.
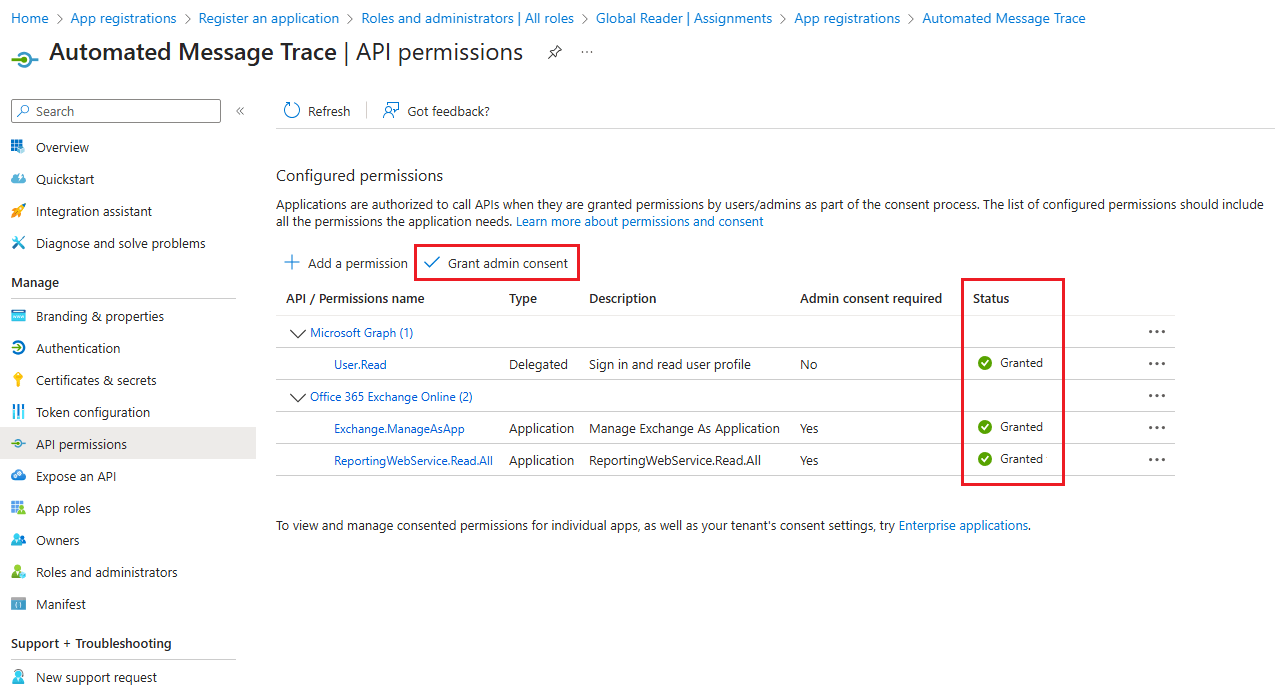
As a final required step, be sure to click the option to Grant admin consent for [Tenant Name] to provide admin consent to the API permissions that were just added. The steps above only assign the permissions to the application, but admin consent is required before the application can utilize them.
Step 3: Create a self-signed certificate and import it to the application
The app registration that was created in Microsoft Entra will make use of a certificate that we'll generate on a local computer for authentication. As mentioned at the start of this guide, the certificate will be used in place of providing credentials within the script file itself as a more secure method of authenticating to Microsoft 365 for the purpose of running the message trace.
The PowerShell command below is best to be run on a Windows server where we'll be running the scheduled task from. This being the scheduled task that will run the PowerShell script to perform the message trace tasks. This command also specifies that the certificate that's being generated will be valid for 4 years (48 months.) You may wish to increase or decrease this value depending on your needs. The goal is to ensure that the certificate remains valid for the lifecycle of the script to perform its tasks. For example, if you only need to have this script run within your tenant for 90 days, you can change the value shown below to 3 months.
It's also worth noting that the PowerShell command below will save this certificate to the LocalMachine certificate store. This is to ensure that another user, such as a service account, will have access to it. Depending on your needs, you may want to update this specification to "CurrentUser" if you intend to use the current user credentials for authentication when setting up the scheduled task that'll be created in the steps to follow.
New-SelfSignedCertificate -Subject "Automated Message Trace" -CertStoreLocation Cert:\LocalMachine\My -NotAfter (Get-Date).AddMonths(48)
The command above will output a certificate thumbprint that we'll need to take note of. This certificate thumbprint will be used in the following command to export the certificate file that'll then be imported for use by the application created in Microsoft Entra for authentication. This certificate thumbprint will also be used in the final PowerShell script when connecting the Exchange Online. Update the entry highlighted below to the certificate thumbprint that was provided to you from the previous command. If you've also modified the script to save the certificate to the CurrentUser certificate store, you'll need to make this same modification in the following command as well.
Export-Certificate -Cert Cert:\LocalMachine\My\D93C6E7C5E2A4EBB3B582473BA8182BE04C1D677 -Type Cert -FilePath AppReg.cer
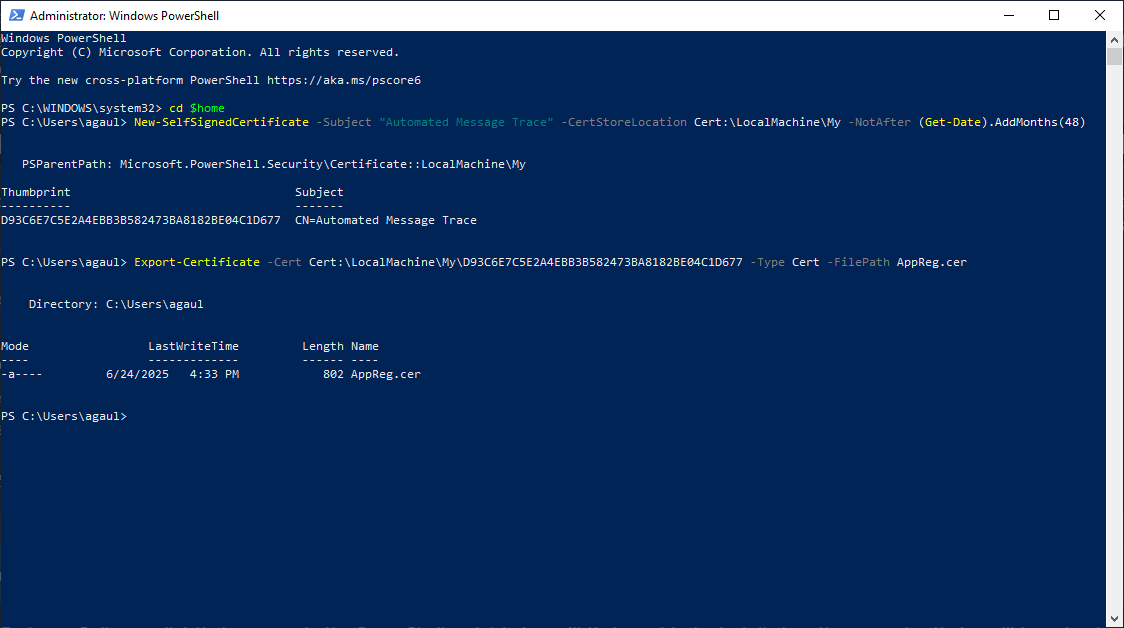
Upon execution of the above command, a CER file will be saved to the PowerShell prompt's current directory. This is normally the %userprofile% location in Windows if you've left this entry as the default. The next part of this section will outline the process of uploading this CER file, which contains the public key for this certificate, to the application that was registered in Microsoft Entra.
- Return to the Microsoft Entra portal and select App registrations under the Application section.
- Locate and select the application that was created in step 1 by its name.
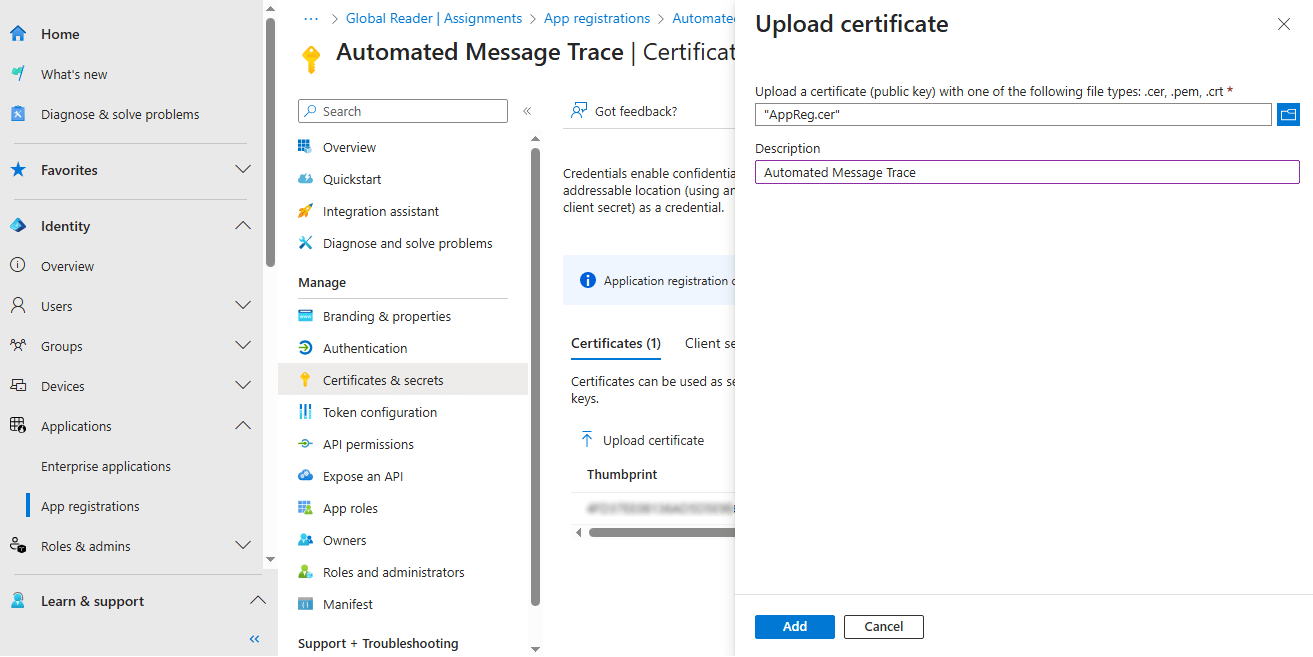
- Select Certificate & secrets under the Manage section of the application.
- Click the option to Upload certificate and browse to the CER file that was exported using the previous PowerShell command above.
- Provide a Description for the certificate and click the Add button to complete the process.
Step 4: Create the PowerShell script that'll run the Message Trace
The Connect-ExchangeOnline cmdlet that appears in the PowerShell script below will first need to be installed on the computer that you'll be using to run this script. This is done by running the command below in an elevated PowerShell prompt. This procedure will only need to be done once. If you've already installed the Exchange Online PowerShell module on this computer in the past, you can skip this step.
Import-Module ExchangeOnlineManagement
The code snippet at the end of this section contains the entirety of the PowerShell script that'll be created and scheduled to run within Windows. This example shows how two different message trace commands can be part of the same PowerShell script. You may wish to remove one of these entries or add additional Get-MessageTrace commands to complete additional message trace tasks as part of this same script.
There are a number of highlighted items below that'll require modification. The first command that's present contains three separate parameters that are used in the authentication process.
- The -CertificateThumbprint parameter will need to be replaced with the certificate thumbprint shown in the output of the first command in step 3.
- The -AppID parameter will need to be replaced with the application ID shown for the application in Microsoft Entra. This can be found in the Overview section of the app that was created in step 1. Figure 2 above also shows the application ID when adding the Global Reader role.
- The first half of the -Orgranization parameter will need to be updated to the onmicrosoft.com subdomain for your Microsoft 365 tenant. This can be found in the Domains section of the Microsoft 365 admin center.
The Get-MessageTrace commands will need to be updated to include the sending addresses that you'd like to complete the message trace for. You may wish to also include other parameters in these commands as well. Such as a recipient address or status. Please see the reference for Get-MessageTrace on Microsoft Learn for more information on these additional parameters and how to include them. The StartDate and EndDate parameters will need to be adjusted based on your needs as well. The options that are set below will perform a message trace that includes the last 7 days prior to the current date.
Following the Get-MessageTrace command is the Export-Csv command. This will also need to be updated to include the directory and a prepended filename of your choosing for the CSV file to be created during the export. The current timestamp will be appended to this filename automatically. For example, the first Get-MessageTrace command that appears in the PowerShell script below will create a file with an absolute path of D:\MsgTrace\User1_20250625_123814.csv
The last command in this script will automatically purge all CSV files in the directory where these files are being stored. For this reason, it's recommended that a dedicated directory be created for storing the CSV files that are being exported. Be sure to update the directory path that appears in this command to the directory you've specified in the prior Export-Csv commands. You may wish to increase or decrease the retention from the set value of 180 days. If you don't wish to include automatic purging of these CSV files, you may remove the last line of this script altogether.
Connect-ExchangeOnline -CertificateThumbprint D93C6E7C5E2A4EBB3B582473BA8182BE04C1D677 -AppID 18b97ad5-7cbe-4182-925a-************ -Organization tenantname.onmicrosoft.com


Get-MessageTrace -SenderAddress user1@gaultech.com -StartDate (Get-Date).AddDays(-7) -EndDate (Get-Date) | Export-Csv "D:\MsgTrace\User1_$((Get-Date).ToString('yyyyMMdd_HHmmss')).csv"


Get-MessageTrace -SenderAddress user2@gaultech.com -StartDate (Get-Date).AddDays(-7) -EndDate (Get-Date) | Export-Csv "D:\MsgTrace\User2_$((Get-Date).ToString('yyyyMMdd_HHmmss')).csv"


Get-ChildItem "D:\MsgTrace" -Recurse -Include *.csv | Where CreationTime -lt (Get-Date).AddDays(-180) | Remove-Item -Force
Once the script and its parameters have been adjusted, the file can be saved as a PS1 PowerShell file. Be sure to save this file in a directory that'll be accessible when creating the scheduled task within Windows in the last step to follow.
Step 5: Schedule the PowerShell script to run using Task Scheduler
Windows Task Scheduler will now be used to run the PowerShell script. Which will complete the message trace tasks within Microsoft 365 as often as they're needed. Similar to how Task Scheduler was used to Run PowerShell scripts using Group Policy through the use of an immediate task. In this case, Task Scheduler will be set to run this script daily, weekly, monthly, etc. based on your needs. The list below will go over the process of creating a new task and setting the parameters on the General and Triggers tabs.
- Open Task Scheduler by completing a search for the utility from the Windows Start Menu.
- Select the option to Create Task from the Action item in the menu bar.
- Assign a Name for the task and enter the credentials that'll be used to run the PowerShell script.
- On the Triggers tab, create a new trigger and specify how often you'd like the PowerShell script to run.
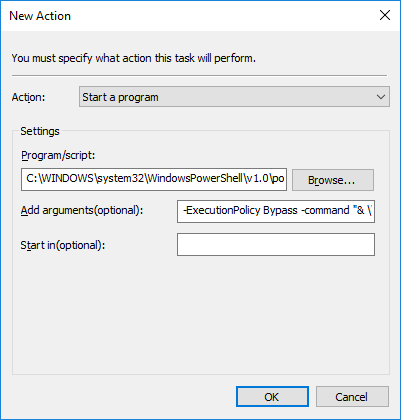
Once the above steps have been completed, proceed to the Actions tab. Here we'll select the option to Start a program from the Action field drop down menu. Then add the following path to the PowerShell executable in the Program/script input field.
C:\WINDOWS\SYSTEM32\WindowsPowerShell\v1.0\powershell.exe
The final step in this process is to reference the path to the PS1 file that was created in step 4. This file will then be ran by the PowerShell executable to complete the message trace tasks. Be sure to update the highlighted item below to reflect the file path where you've save the PS1 file on your computer. Then apply this string to the Add arguments input field.
-ExecutionPolicy Bypass -command "& C:\SCRIPTS\msgtrace.ps1"
Click OK to exit the prompts and save the settings to the scheduled task.